Wednesday, May 30, 2012

Flowerpot Pie


If you're looking for daily cooking inspiration, you simply must sign up for the free Hoosier Homemade newsletters.  I don't know how Liz, the Cupcake Lady, does it, but she delivers multiple new ideas - with step-by-step pictures! - to my in-box several times a day.  It's really quite extraordinary.

She created this Flowerpot Pie for Earth Day.  The minute I saw the colorful gum drop flowers, I was smitten. I absolutely had to make it, and for what better occasion than our Memorial Day BBQ?!

I had just one hestitation, though.  Liz's recipe calls for instant pudding mix and Cool Whip.  I didn't want to go that route.  Nothing wrong with those ingredients; they are great for quick and consistent results.  But, I wanted to create the most amazing chocolate cream pie I could.  I wanted a high-end, lubricious filling for this pie.  I wanted a French Silk Chocolate Pie. 

Where do you turn for the most authentic, deluxe recipes?  Cook's Country, of course! They test and re-test their recipes so that you know, if you follow it carefully, your dish will come out perfectly.  Plus, in their recipe, the eggs are cooked so the very slight chance of salmonella is completely removed.

I also eliminated the walnut "rocks" from my version, since one of the BBQ guests was allergic to nuts.  She sure appreciated being able to have a slice of this decadent treat. My husband had two slices and only refrained from taking more because he didn't want to deny others their pieces.  Another guest described it as "better than sex".  High praise, indeed!

Ingredients: 

Filling & Crust
  • 1 cup heavy cream, chilled
  • 3 large eggs
  • 3/4 cup sugar
  • 2 tablespoons water
  • 8 ounces bittersweet chocolate, melted and cooled (I used 2 4-ounce Ghiradelli 60% cacao chocolate bars, from the baking aisle.)
  • 1 tablespoon vanilla extract
  • 8 tablespoons (1 stick) unsalted butter, cut into 1/2-inch pieces and softened
  • 3/4 cup chocolate chips (You can also add 3/4 cup of walnuts for more "rocks" in the flowerpot.)
  • 1 (9-inch) pie shell, baked and cooled (I used a frozen deep dish crust from the grocery store.)
  • 20 chocolate sandwich cookies, finely crushed or other chocolate cookie (I used Teddy Graham's Chocolate Graham Snacks.)
  • Gummy worms (to scatter on top)
Gum Drop Flowers 
  • Gum drops
  • Mini cookie cutters in flower and leaf shapes (I used fondant cutters I found at Jo-Ann's.)
  • Pretzel sticks
  • Small amount of sugar for rolling the gum drops out
  • Small amount of frosting to attach centers and leaves
Directions: 
 
Filling
  • With electric mixer on medium-high speed, whip cream to stiff peaks, 2 to 3 minutes. Transfer whipped cream to small bowl and refrigerate.
  • Combine eggs, sugar, and water in large heatproof bowl set over medium saucepan filled with ½ inch barely simmering water (don’t let bowl touch water).
  • With electric mixer on medium speed, beat until egg mixture is thickened and registers 160 degrees, 7 to 10 minutes.
  • Remove bowl from heat and continue to beat egg mixture until fluffy and cooled to room temperature, about 8 minutes.
  • Add chocolate and vanilla to cool egg mixture and beat until incorporated. Beat in butter, a few pieces at a time, until well combined.
  • Using spatula, fold in whipped cream until no streaks of white remain.
  • Fold in chocolate chips.
  • Scrape filling into pie shell and refrigerate until set, at least 3 hours and up to 24 hours.
Gum Drop Flowers 
  • On a cutting board or hard surface, sprinkle a small amount of sugar.
  • Using your hand, press gum drop out then roll out with a rolling pin, flipping from side to side several times.
  • Cut flower out with cookie cutter.
  • Repeat for leaves and centers of flowers.
  • Attach to the pretzel with a small amount of frosting.
  • Place in fridge or freezer for about 15 minutes to set the frosting.
Assembly
  • Sprinkle chocolate cookie (or chocolate graham cracker) crumbs on top of chiled pie.
  • Place flowers randomly on top of pie, gently pushing the pretzel stems down into the filling so they're secure.
  • Scatter gummy worms between flowers.
This dessert is a little difficult to transport, particularly in a hot climate like Las Vegas where I live.  However, if you freeze it ahead of time and bring frosting with you to make repairs, you'll be able to make a beautiful presentation at any party.

Cheesy Sausage Bake


To balance out the "unhealthy" stuff I was bringing to our recent Memorial Day BBQ, I decided to go with a good-for-you main dish that would be hearty but not artery-clogging.  This recipe popped into my email via one of the many foodie e-newsletters I subscribe to, and I thought it would do nicely.  And do nicely it did.  It's satisfying, but I felt something was missing.  Perhaps not enough cheese? I'll have to experiment a bit more with this one.  I also would use another choice for milk, since the almond milk added a slightly sweet overtone to it.

Ingredients:
  • 12 ounces turkey breakfast sausage (I used Jimmy Dean's Hearty Turkey Sausage Crumbles.)
  • 2 cups unsweetened vanilla almond milk
  • 2 cups egg substitute
  • 1 1/2 teaspoons yellow mustard
  • 13/4 teaspoon salt
  • 1/2 teaspoon freshly ground black pepper
  • 1/4 teaspoon ground red pepper
  • 3 large eggs
  • 16 slices whole wheat bread (I used Wonder.)
  • 1 cup (4 ounces) finely shredded reduced-fat cheese (I used a Mexican blend.)
  • 1/4 teaspoon paprika  
Directions:
  • Heat a large nonstick skillet over medium-high heat. Coat pan with cooking spray. Add sausage to pan; cook 5 minutes or until browned, stirring and breaking sausage to crumble. Remove from heat; cool. (Since I used pre-cooked sausage crumbles, I didn't have to cook them in a pan before assembling the dish.)
  • Combine milk and next 6 ingredients (through eggs) in a large bowl, stirring with a whisk.
  • Trim crusts from bread. Cut bread into 1-inch cubes. (I just tore up the bread. I liked the rustic look.)
  • Add bread cubes, sausage, and cheddar cheese to milk mixture, stirring to combine.
  • Pour bread mixture into a 13 x 9–inch baking or 3-quart casserole dish coated with cooking spray, spreading egg mixture evenly in baking dish.
  • Cover and refrigerate 8 hours or overnight.
  • Preheat oven to 350°.
  • Remove casserole from refrigerator; let stand 30 minutes. Sprinkle casserole evenly with paprika.
  • Bake at 350° for 45 minutes or until set and lightly browned. Let stand 10 minutes.

Red, White & Blue Strawberries


I brought these to last week's Memorial Day BBQ, which my good friends Christie and Steve host every year.  They were a special request, having been a huge hit when I first shared them at a party a couple of years ago.  They are very impressive but extra easy to make.  They taste pretty good, too!

Ingredients:
  • Strawberries
  • White candy melts
  • Blue candy melts
Directions:
  • Sort through strawberries, discarding damaged ones.
  • Rinse and dry thoroughly.
  • Line a baking sheet with parchment paper and set aside.
  • Melt white candy melts according to package instructions.
  • Dip strawberry into white candy, going about 3/4 of the way up the berry and allowing the excess to drip off, back into the dish of candy.
  • Place on parchment-lined baking sheet.
  • Repeat with remaining strawberrries and chill briefly in the freezer.
  • Repeat process with blue candy melts, dipping only 1/4 to 1/2 way up each berry, to allow white layer to show through.
  • Chill in refrigerator until ready to serve.
  • Serve on a pretty platter, discarding the parchment paper.
This recipe is linked up at Red, White & Blue Link Party.

Friday, May 18, 2012

Local Flavor, Laughlin Edition: Firehouse Coffee Company


Heading to Laughlin for a relaxing getaway, to take in a rooftop concert, or for a motorcycle event?  You definitely want to make time to visit Firehouse Coffee Company while you're there. Firehouse is family-owned by Dana and Karen Kern, who've been a fire department family for over 20 years.  With a charming ambiance of soft lighting and fire-related paraphernalia, plus the delighftul scent of fresh-roasted coffee, Firehouse inspires you to grab a grind and goodie and set a spell.

My husband Mike and I stopped into the Riverview Mall location in Bullhead City, Arizona, after Mike flew us down in the low-wing for a Doobie Brothers concert.  It was hot, hot, hot when we arrived in the mid-afternoon, so we were in much need of cool refreshment.  I'd been to Firehouse one time before and enjoyed it so much that I insisted Mike had to try it. 

Mike had a "skinny" vanilla latte and a homemade eclair.  I got an iced black tea sweetened with sugar-free caramel syrup, and Mike and I shared an orange-cranberry scone.  Being a big fan of ooey-gooey chocolate-coated things, I thought I'd like the eclair the best.  Nope, the scone impressed me more with the tart fruit flavor and the just-right firm-but-crumbly texture.  The eclair was pleasant with a vanilla pudding-like filling, rather than the Boston Cream-style filling I'm accustomed to. 

Normally, that would have been it for us, but then I saw the sign for the Firehouse Hot Lips Latte.  How could I resist sampling a beverage with that name AND made with "velvet" steamed milk?!  In addition to the milk, the latte featured espresso, white chocolate, cinnamon, and homemade whipped cream.  It was good, but I felt slightly disappointed.  I guess I expected more "wow!" factor from it, and it was akin to some of the seasonal offerings at Starbucks: good but not extraordinary.

The bakery case at Firehouse is full of sweet and savory choices, and I'm looking forward to going back to try more of those and another one of their coffee drinks.

Thursday, May 17, 2012

Local Flavor, Vegas Edition: Cravin' Cake Bakery & All About Catering


Who doesn't want to get an invitation to a VIP Cake Tasting Event? It's probably the best thing that could ever pop into your email box.

So you can imagine how delighted I was when I received my VIP invitation to Cravin' Cake Bakery's Tasting Event on May 15th. A buffet of sweet goodies for only $18 a person? Great way to jazz up a Tuesday evening! Supporting a local business owner, an "entrepreness", made it even better.

Brittney Belanger is the owner of Cravin' Cake as well as the cake decorator and pastry chef. In her white jacket, she looks the part of someone who has a Pastry Arts Degree from College of Southern Nevada and has worked for Jean-Philippe Patisserie.

All that training and experience reveals itself in her confections. They are delicious! Every single thing my husband and I tried (yes, I brought him along to share munching duties) was super yummy. Some things were supercalafragi-delicious. Like the Slivered Almond & Coconut Haystacks and the Cinnamon Twists.

Brittney made Crispy Rice Treats look elegant by dipping and drizzling them in chocolate. The Chocolate-Covered Bananas were substantial and playful, coated in multi-colored sprinkles. Brittney bumped up the cinnamon in the Cannoli filling and added chocolate chunks, as if they weren't rich enough already. My husband's favorite treat was the Chocolate Pudding Cake Cup, generously topped with cocoa. It was deeply chocolaty, creamy and very moist: wonderful mouth-feel.

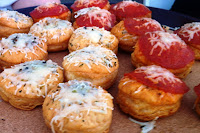
Brittney is equally gifted with savory items like her Puff Pastry Pizzas and Cheese & Bacon Hard Rolls.

Not being one to hog the spotlight, Brittney invited Alexis Amity, co-owner of All About Catering, to add her creations to the mix. I'm so glad she did!

Aexis' three appetizers were outstanding. The purple Mashed Potato, Bacon & Chicken Bites were as lovely to look at as they were to eat.  The Chicken Quesadilla Triangles were topped off with a dollop of guacamole and a flavorful pineapple salsa.

The Watermelon Slices with Arugula, Soy Nuts, Yellow Raisins & White Wine Vinaigrette were unbelievably good! I was hestitant to try them because I don't like watermelon. But, they looked so pretty, and Alexis encouraged me to give them a chance. I was very pleasantly surprised. The crunch and mild sweetness of the watermelon was the perfect foil for the tang of the vinaigrette, the salty soy nuts and the fresh arugula. Alexis commented that they try to be as 'green' as possible in their business, and she felt this was the ideal, eco-friendly finger food that didn't require a plate or utensils. All I know is that they were delish.

Now to answer the question I know you're dying to ask me. How does one go to an event like this and not pop the button on your pants? The key is embracing the word "tasting". I limited myself, mostly, to one or two bites of an item. I had enough to give me a good sense of the food and then set it aside. I felt some pangs of guilt when I tossed half-full plates into the trash, but I reminded myself that moderation is a virtue.

Our money was well spent for this event, and I would highly recommend both of these ladies for any events you have coming up in Vegas.

Wednesday, May 16, 2012

Food Philanthropy: Dinner On Us

photo by  Bill Hughes

I read about Dinner On Us in the May 2012 issue of Desert Companion magazine.  Wow!  What a neat organization!

Dinner On Us hosts a dinner at Las Vegas Rescue Mission (480 W. Bonanza Road) on the first Saturday of every month.   Founder Giovanna Raccosta's goal is to elevate the dining experience for the most challenged in our communities.  They are the homeless, the addicted, the unfortunate...those who're barely surviving on our streets and require assistance from places like the Mission, which provides food, counseling, shelter and emergency support.

A meal by Dinner On Us is much more than a way to take in calories; it's a way to feed the spirit as well as the body with homemade dishes that celebrate international cuisine, fresh flowers and entertainment.  The all-volunteer organization apparently delivers a dining experience on a par with the nicest restaurants on the Strip.

I've reached out Ms. Raccosta to see how I can help.  Want to join me? Email her at gioracc@gmail.com for details on the next event.


Monday, May 14, 2012

Light-As-Air Chocolate Cake

 
This recipe was in a Taste of Home newsletter recently.  I tweaked the ingredients slightly, going with a sugar-free cake mix and unsweetened almond milk to "healthify" a bit more.


I made it for a housewarming party and got good feedback.  In a backhanded compliment, one taster told me she liked a heavier, buttercream-style frosting, that this one was a little too airy. 

By the way, what looks vaguely like a bit of butter on the top of the cake slice is actually a white chocolate shaving.  :)
 
Ingredients:
 
Cake:
  • 1 package sugar-free chocolate cake mix
  • 1 2.1-ounce package sugar-free, fat-free instant chocolate pudding mix
  • 1 3/4 cups water
  • 3 egg whites
Frosting:

 
  • 1 1/4 cups cold unsweetened vanilla almond milk
  • 1/4 teaspoon almond extract
  • 1 1.4-ounce package sugar-free, fat-free instant chocolate pudding mix
  • 1 8-ounce carton reduced-fat whipped topping
  • Dark chocolate curls
  • White chocolate curls
Directions:

 
Cake:
  • Pre-heat oven to 350 degrees.
  • In a large bowl, combine the cake mix, pudding mix, water and egg whites.
  • Beat on low speed for 1 minute and then on medium speed for 2 minutes.
  • Pour into roughly a 9x13 baking pan, spritzed with non-stick buttery spray.
  • Bake for 12-18 minutes.
  • Cool on a wire rack.

Frosting:
  • Place milk and extract in a large bowl.
  • Sprinkle with 1/3 of the pudding mix.
  • Let stand for 1 minute.
  • Whisk pudding into mix.
  • Repeat twice more until all the pudding mix is incorporated.
  • Whisk for 2 minutes longer.
  • Let stand for 15 minutes.
  • Fold in whipped topping.
  • Garnish with dark chocolate and white chocolate shavings.

Beef & Bean Tacos


I finally had a chance to make dinner for my husband using the homemade tortillas I'd whipped up a week or so ago, and I decided to go with one of his favorites: tacos.  These soft tacos are very easy to make and can be customized with any ingredients you or the fam might like.

Ingredients: 
  • 1 1/4 pound extra-lean ground beef
  • 1/2 packet ranch dressing mix
  • 1/2 packet cheesy taco seasoning mix (or regular taco seasoning mix)
  • 1/2 cup refried beans, at room temperature
  • Shredded Mexican cheese
  • Shredded lettuce
  • Pico de gallo
Directions: 
  • Cook ground beef in fry pan over medium heat.
  • Once cooked through, mix in ranch packet and cheesy taco seasoning mix, blending thoroughly.  (No need to add liquid; just use the little bit of grease from the hamburger.  The cheesy taco mix adds some creaminess to the hamburger, which is why I like it.)
  • Assemble tacos by spreading a layer of the refried beans onto the tortilla and topping with shredded lettuce, shredded cheese, ground beef mixture and pico de gallo.
Note: Depending on how you assemble your tacos, you may have some ground beef left over.  Just refrigerate it and use it to make these tasty tacos again.

Saturday, May 12, 2012

Party Crackers


I first tried these savory saltine crackers at the Taste & Toast Thursday's farmer's market at Tivoli Village.  One of the vendors was offering samples.  One taste, and I was hooked.  Smart vendor! She had the snacks pre-made, in bags, and ready-to-eat, and she was selling the mix, "The Original Savory Saltine Seasoning", to make your own at home.  I bought the mix and made some for my husband.  He loved them and found them, like I did, to be addictive.  It took a supreme act of will to stop munching!

I wasn't wild about all the additives in the mix, so I decided to try making my own version.  I was surprised to find several different recipes online, and after trying a couple, I found my favorite.  It's not entirely additive-free; the ranch dressing mix has some.  But at least it's a little better, and using the Smart Balance oil helped with boosting the nutrient value, if not reducing calories.  The chili pepper flakes give the crackers some bite, but the heat is tempered by the Parmesan.  Just enough... but not too much.  

These are super easy to make and very tasty.  I brought them to a 60th birthday party, and they were gobbled up.

Ingredients:
  • 3 sleeves whole grain saltine crackers
  • 1 cup canola oil (I used Smart Balance Omega 3 oil.)
  • 1 packet ranch dressing mix
  • 3 tablespoons grated Parmesan cheese
  • 1 tablespoon crushed chili pepper flakes
Directions:
  • Pour oil into a gallon-size zip-top plastic bag.
  • Add ranch dressing mix, Parmesan cheese and chili pepper flakes.
  • Stir to combine thoroughly.
  • Add crackers.
  • Seal bag without releasing the air.
  • Gently shake crackers in bag so that oil mixture coats crackers.
  • Let rest for 10 minutes and shake again.
  • Let rest for another 10 minutes and shake again.
These taste best, and are less greasy, if they are allowed to sit overnight before serving.

Sunday, May 6, 2012

Homemade Tortillas


Inspired by my very good friend, Becky Johnson, who recently made tortillas from scratch for the first time, I decided to try it myself.  As Becky and others report, it's not hard to do. It is, though, a time-consuming process because you cook each tortilla individually.  One recipe makes a bunch of 'em, so it makes sense do it on the weekend and then freeze them for meals throughout the week.  They're inexpensive, and it's nice to use healthier ingredients like whole wheat flour.

Becky's blog post has a great tutorial that nicely illustrates each step of the process.  

My husband snacked on a couple of these with butter and really enjoyed them.  I think they'd be good with some jam as well, which is what I've pictured here.  My husband's working out of town this week, so I'm freezing the remainder of the tortillas until he gets home.  I plan to make steak tacos for him.  I'll post the recipe here, of course.

Ingredients:
  • 2 cups 100% whole wheat flour
  • 2 cups white flour
  • 2 teaspoons baking powder
  • 1 teaspoon sea salt
  • 2 tablespoons butter
  • 1 1/2 to 1 3/4 cups water
Directions:
  • Whisk the flours, salt and baking powder together.
  • Cut the butter into the flour mixture until it resembles corn meal.
  • Add the water and mix until a dough forms, kneading lightly.
  • Divide the dough into 24 golf-ball size balls.
  • Preheat a skillet over medium-high heat.
  • Grease (with non-stick olive oil spray) or flour a cutting board and roll out each ball into a thin, round shape.
  • Place into the hot skillet and cook until lightly browned; then flip.
  • Continue rolling and cooking the remaining balls of dough.

Mango Margarita Cupcakes


My "adopted fam" in Vegas always throws a Cinco de Mayo fiesta, and there's never a lack of yummy food or alcohol.  However, this year's party was the last one in the house they've lived in for 18 years.  Such a momentous occasion required a little extra effort beyond showing up to the party, and I wanted to make something special.  A little Internet research, Googling "cinco de mayo recipes", led me to Hoosier Homemade, the blog of Liz, the Cupcake Lady. Liz's blog is fantastic.  It's already become one of my favorites. Liz blogs about baking, cooking, and decorating, and she has several terrific free email newsletters you can sign up for.  I highly recommend them.

On Hoosier Homemade, I found a  wonderful recipe for Margarita Cupcakes.  I adapted mine just slightly by using a mango mix and adding it to the frosting.  

The cupcakes started disappearing as I was walking up the drive to my adopted fam's house.  Several comments were made about the cupcakes matching my outfit.  I swear I didn't plan it that way!  Those enjoying a quiet moment outside quickly snapped the sweet treats up, and they kept being plucked from the tray as I made my way through the house to the outdoor patio area in the back.  A good sign, don't you think?! :)

About the frosting: Including the margarita mix made it a bit runny.  It held up fine when I chilled it in the fridge after frosting the cupcakes.  You may want to use less than I did to keep it fluffier and firmer. I did, however, get great feedback on how good the frosting tasted, so it may be worth it to have it a little softer.

Ingredients:

Directions:
  • Preheat oven to 350 degrees.
  • Spritz cupcake liners with non-stick buttery spray, if you'd like.
  • Combine all ingredients up to frosting in a large bowl and beat for about 2 minutes, until well blended.
  • Spoon into cupcake liners.
  • Bake for 12-15 minutes or until a toothpick inserted comes out clean.
  • Allow to cool.
  • While the cupcakes are baking, stir margarita mix into frosting.
  • Place a few drops each of red and yellow food coloring into the frosting and stir, adding more food coloring if necessary to achieve the desired color.
  • Chill until the cupcakes are ready.
  • Frost and top with an orange candy slice.

Tuesday, May 1, 2012

Fruit & Nut Bars


These remind me of KIND bars, which are a new favorite "granola" bar of mine.  I replaced some of the nuts with chia seeds to keep the crunch but add more nutrition.

Ingredients:

  • 2 cups puffed brown rice cereal
  • 1 cup dried strawberries
  • 1 cup dried papaya, diced
  • 1 1/2 cups roasted almonds
  • 1/2 cup chia seeds
  • 1/2 cup chopped dark chocolate
  • 2 tablespoons butter
  • 2 tablespoons brown sugar, packed
  • 1/2 cup honey
  • 1/4 cup dark chocolate almond spread (or Nutella)
  • Sea salt
Directions:
  • Spritz a 9x13 baking pan liberally with non-stick spray.
  • In a large bowl, combine cereal, dried fruits, almonds and chocolate chunks.
  • In a small saucepan, heat butter, brown sugar, honey and almond spread, whisking until everything is melted and combined.
  • Pour sauce over cereal mixture and stir to coat thoroughly.
  • Spread into prepared pan, pressing down firmly and evenly.
  • Lightly sprinkle with sea salt.
  • Chill until firm.
  • Cut into bars.
Note:  To roast the almonds, preheat the oven to 350 degrees.  Spread the almonds out in one layer on sheet pan.  Roast for 12 minutes or until lightly browned and fragrant.

Adapted from http://whiteonricecouple.com/recipes/fruit-nut-bars/